Materials Needed
Cardboard
String
Strong yarn
Pencil
Tape
Scissors
Ruler
Tapestry needle, or
Large-eyed needle
(optional)
Dowel or stick:
7 in or longer
(optional)
Directions
Step 1
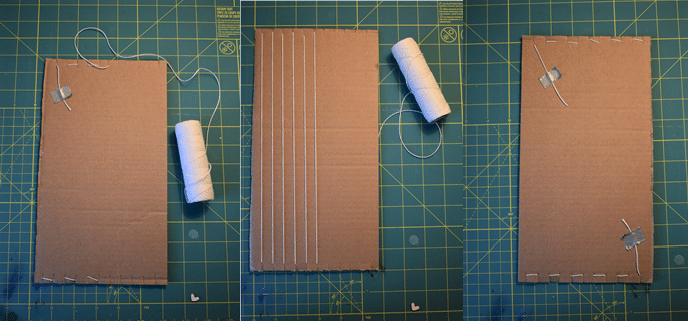
Cut a rectangular piece of cardboard 12 in x 6 in.
(The one shown below was made from a recent delivery box.)
Note: Children in grades 1-4 may need help setting up their looms. Younger students may benefit from their first looms being a little smaller, 6 in x 4 in.
Step 2
With your pencil mark every ½ inch across the top and bottom of the cardboard.
Step 3
Cut ½ inch into the cardboard at each of the marks you made.
Step 4
Tape the string (or strong yarn) in the corner on the back of the loom.
Leave yourself a few inches to tie at the end of the project.
Step 5
Warp your loom by pulling the string through the first cut on the top of the loom down the length of the loom to the first cut on the bottom.
Wrap the string around the tab to the next cut and up the length of the loom to the next cut on the top of the loom.
Repeat until you have pulled the string through all of the cuts.
Leave yourself a few inches of string, snip the thread, and tape the end to the back of the loom.
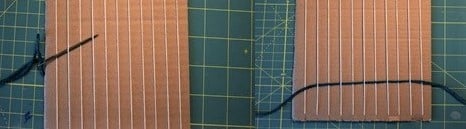
Note: The strings across your loom are called the warp. This is the foundation of the weaving. The threads that cross the warp are called the weft.
Step 6
Cut a piece of yarn about the length of one arm.
(If you have a needle large enough to thread the yarn, it is helpful but is not necessary.)
Leaving a tail about a few inches long at the end, pull the yarn through the warp strings by going over then under the strings in sequence.
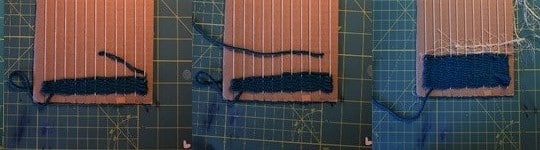
Step 7
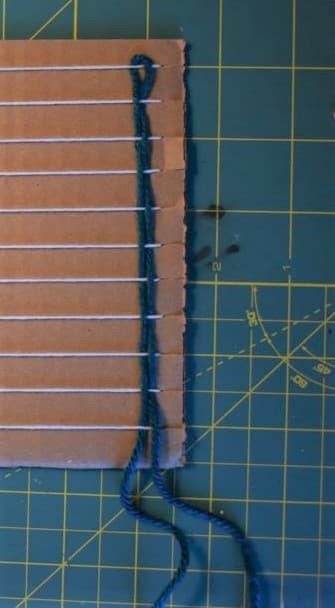
Once you have completed the first row, push the yarn to the bottom of the loom with your fingers.
Step 8
If you ended the first row by pulling the yarn over the last warp string, you start the second row by looping the yarn back under the last warp string.
Repeat the over-and-under process.
Step 9
As you pull the yarn through, create a small arc across the weft.
Then push it down with your fingers.
(This prevents the sides from pulling in.)
Step 10
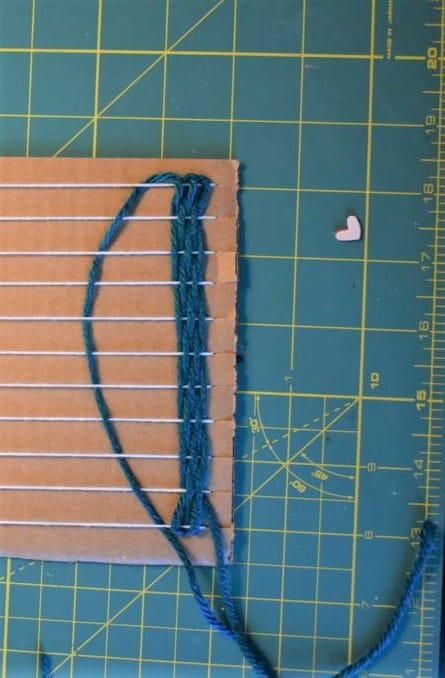
Repeat until you come to the end of the piece of yarn.
Pull the end through the warp so that you finish about halfway across
Step 11
Cut a new piece of weft yarn.
Following the same over-and-under process, pull the yarn through so that two inches of both pieces of yarn overlap.
Continue weaving normally.
(If you want to change the color of your yarn you do so the same way.)
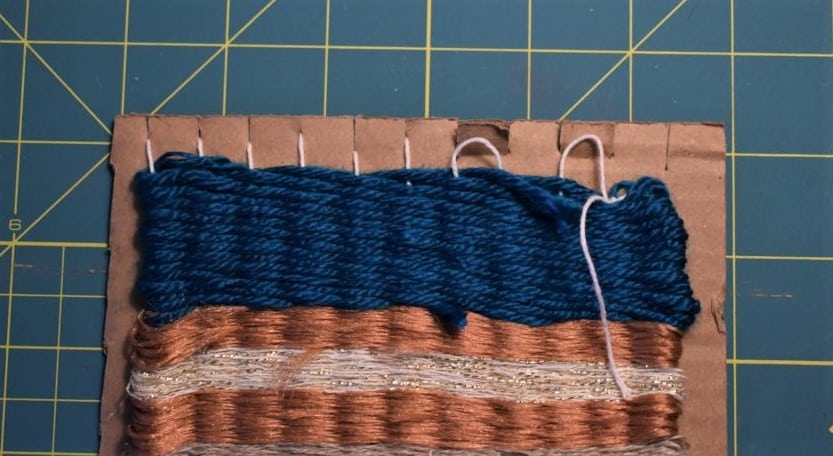
Step 12
Continue weaving until you reach the end of the loom.
On your last pass through the warp try to leave a tail a few inches long.
.
Step 13
When you are done, turn over the loom.
Un-tape one of the ends of the warp string and tie it to the tail of the weft yarn.
(If you were not able to leave the tail on the same side you can tie the warp string to the next loop on the loom.)
Step 14
Once you have secured both ends of the warp string, you can remove the weaving from the loom.
Gently slip the loops off of the tabs.
Step 15
Once the weaving is removed, you can use your fingers to help spread the yarn to fill the little bit on the end.
Cut any loose ends or tuck them through the weaving to the back.

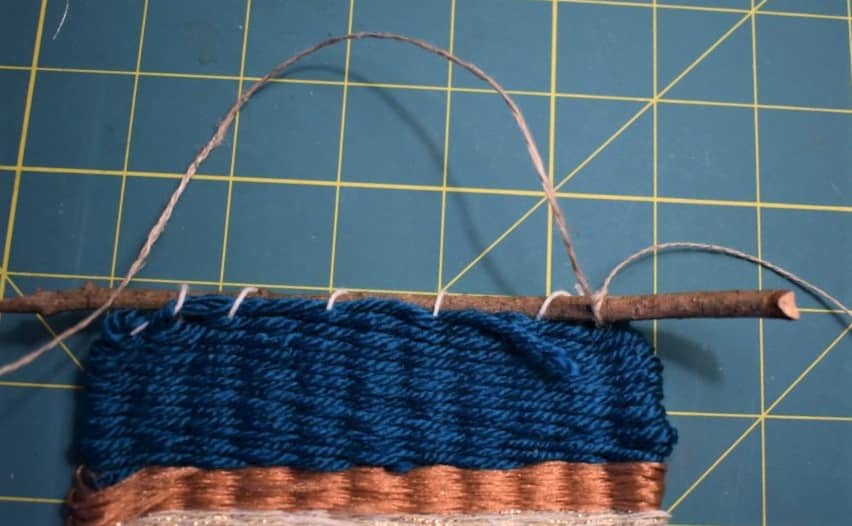
Step 16
If you would like to turn your weaving into a wall hanging, find a dowel or a stick and slip it through the warp loops.
If it is difficult to slide the stick through, you can also tie it to the warp loops.
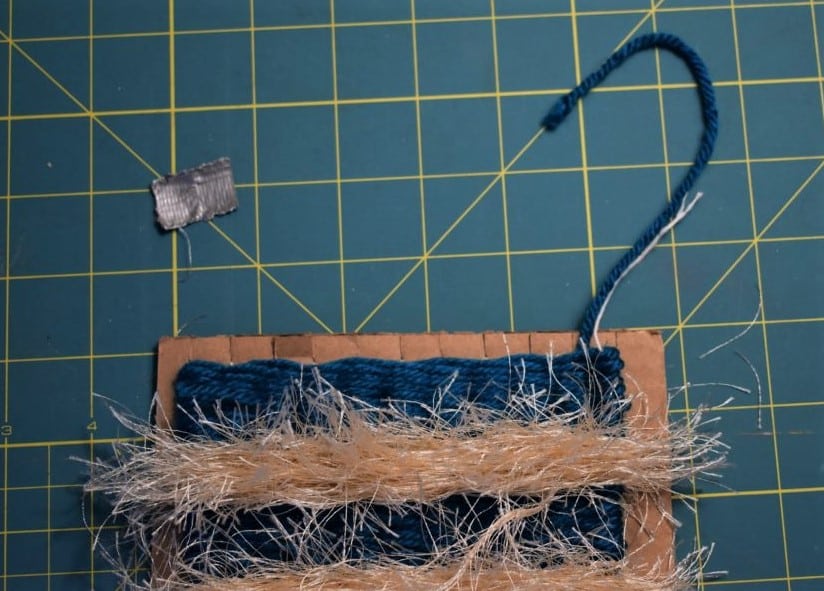
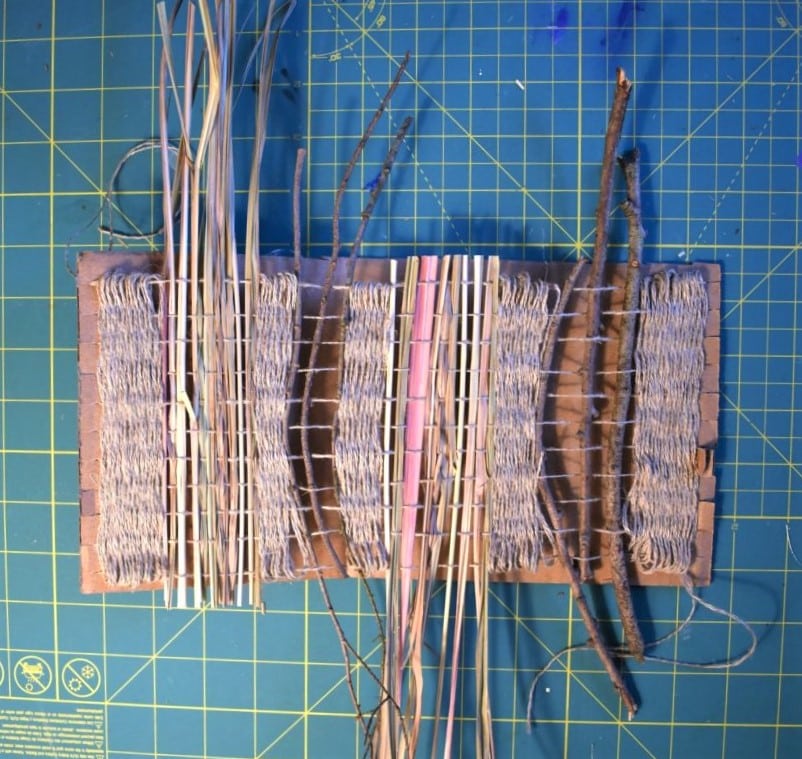
Be creative with your materials. If you don’t have yarn, string is a good substitute. You can even use found materials or strips of paper.
Here is an alternative weaving that was made with string, grass, and twigs. Be aware that the thicker and more rigid your materials, the tension on your weaving will increase and may bend the cardboard loom. That is fine as long as you can keep weaving.
I hope you enjoyed learning how to weave – at home!